Your home or living place have more mosquitoes, Now Don't worry. Only one click, you are relief from mosquitoes..
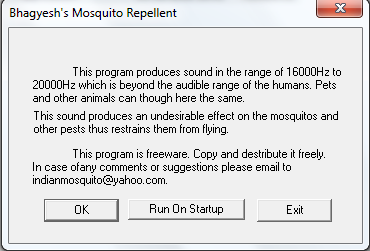
I have to try today night, you also try and write the comment..........
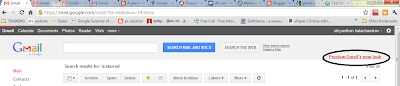
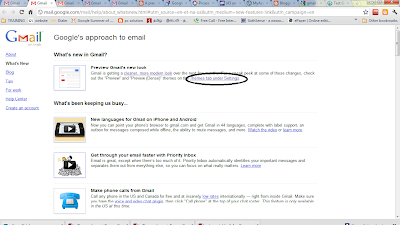
Google+ is gaining popularity ever since its release and it has been well received by users. Now if you have shifted your networking to Google+ from Facebook and Twitter, you can still update the Twitter and Facebook status from Google+. This trick does not involve installation of any extension or add-ons, but uses the mobile functions of both these networking sites.
To update Facebook status from Google+, first grab your Facebook mobile email address from here. This address is unique for your account.
Now open your Google+ account and then type in your status update in the box. In the share with box, paste the Facebook mobile email address. Now share the post and you will see your Facebook status updated.

Unlike Facebook, Twitter does not provide an option to update status via email, so we need to use third party tools like Twittermail. Sign in with your Twitter account and then get the email address associated with your account. Once you get the email address for your Twittermail, follow the same procedure as we did for Facebook.
Additional Tip: You can create two circles, one for Facebook update and one for Twitter. Now add the respective email IDs to these circles. When you want to update status, add these circles to the list.
When you go outside from this blog, Click +1 and go......
Google+’s popularity has made developer make new extensions and tools based on the new social network. The new extensions, Google+Twitter for Chrome brings in your Twitter stream inside Google+. Google+Twitter integrates a full featured twitter client inside your Google Plus Account and you can view Twitter updates from your friends, also reply to your friends and also update your own status. Similarly, the extension Google+Facebook (available for Firefox and IE9) adds Facebook stream inside Google+.

Once installed, the extension adds two new links on the home page to access Twitter and Facebook. You need to authorize both the apps to access respective accounts. Once authorized, you can see live updates from Facebook and Twitter.
When you go outside from this blog, Click +1 and go......
To rip music from a CD to your computer
After the songs have been ripped, you can find and play them in your library.
To rip music from a CD to your computer
When you are connected to the Internet, the Player attempts to retrieve media information (such as the album and artist name) about the tracks being ripped from a Windows Media database that is maintained by Microsoft. The Player then adds the information to the files during ripping. If media information is incorrect or missing, you can add or edit it after ripping. For information about adding or editing media information, see Windows Media Player Help.

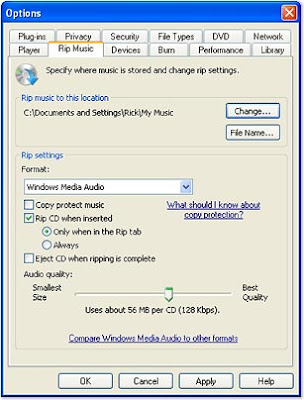
You can also change the default settings later on the Rip Music tab of the Optionsdialog box, which is accessible by clicking the arrow below the Rip tab, and then clicking More Options, as shown in the following screen shot.
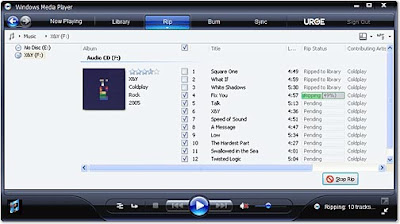
By default, the Player begins ripping the CD automatically when you are in the Riptab or when you first switch to it after the CD was inserted. You can also choose to have ripping begin immediately upon inserting the CD, or you can turn off automatic ripping from the Rip Music tab of the Options dialog box. For information about changing these settings, see Windows Media Player Help.
Note that all songs are selected to be ripped if you have not previously ripped them.
Select the songs you want to rip, and then, at the bottom of the List pane, click Start Rip to restart ripping.
After the songs have been ripped, you can find and play them in your library.
Source – Windows media player - microsoft
Trouble:
Sometimes a virus or some malicious script makes the hidden files and folders not visible even when it is explicitly enabled.
In this case even if the user enables the Show hidden files and folders in
Tools > Folder options > View menu, Hidden files and folder does not become visible.
Lets see how to fix it.
Fix:
First and foremost is the point that the user has enabled the Show hidden files and folder
1. Go to Tools > Folder options. This will show a folder options menu.
2. Go to View tab and select the option “Show hidden files and folder”
The hidden files and folders are displayed by this method normally. But in case some virus or script is preventing the hidden files and folders from being visible, follow the below steps:
1. Go to your Start > Run, type “regedit” and press enter. This will open registry editor.
2. Navigate to HKEY_LOCAL_MACHINE\Software\Microsoft\Windows\CurrentVersion\Explorer\Advanced\Folde r\Hidden\SHOWALL
Note:
DELETE the value CheckedValue in the right window if it already there and type is REG_SZ
Now create a new DWORD value again with the same name CheckedValue.
Double click the value called CheckedValue, and modify its data value (DWORD Value) to 1 (0×00000001). Close registry editor after this and restart your computer.
If still folder options are reverted back to don’t show hidden files and folders then it could be due to some virus still in action.
Navigate to the following path:
HKEY_LOCAL_MACHINE\SOFTWARE\Microsoft\Windows\CurrentVersion\Explorer\Advanced\Folder\Hidden
NOHIDDEN - In the NOHIDDEN folder, select CheckedValue and set the value to 1
Go to Tools > Folder options. This will show a folder options menu.
Go to View tab and select the option “Show hidden files and folder”
Google Books is service from Google which provides you with millions of books online, available for purchase as well as reading. The service comes with tons of free books which are readily available for reading. While the service is really awesome, it does not provide any means to download the free books to desktop. Google Books Downloader is a freeware tool for Windows which can help you download the books from Google.

You just need to specify the book URL collected from Google Books into the app. You can download as JPEG or PDF file based on your requirement. You can specify the location where you want to download it.
Feel free to drop your comments in the comment box please, and ask your questions here.....